
Introduction
This document serves as a guide for developers who wish to implement authentication using IdentityServer4 in their Blazor WebAssembly or Server applications. The guide provides a detailed introduction to the concept of authentication in Blazor and how IdentityServer4 can be used to achieve it. The guide is designed to be easy to follow and provides step-by-step instructions for developers to set up authentication in their applications. By following this guide, developers can ensure their applications are secure and protected against unauthorized access.
Blazor Application and IdentityServer4 Application Architecture
The following diagram illustrates the high-level architecture of a typical Blazor Server or WebAssembly and IdentityServer4 application:
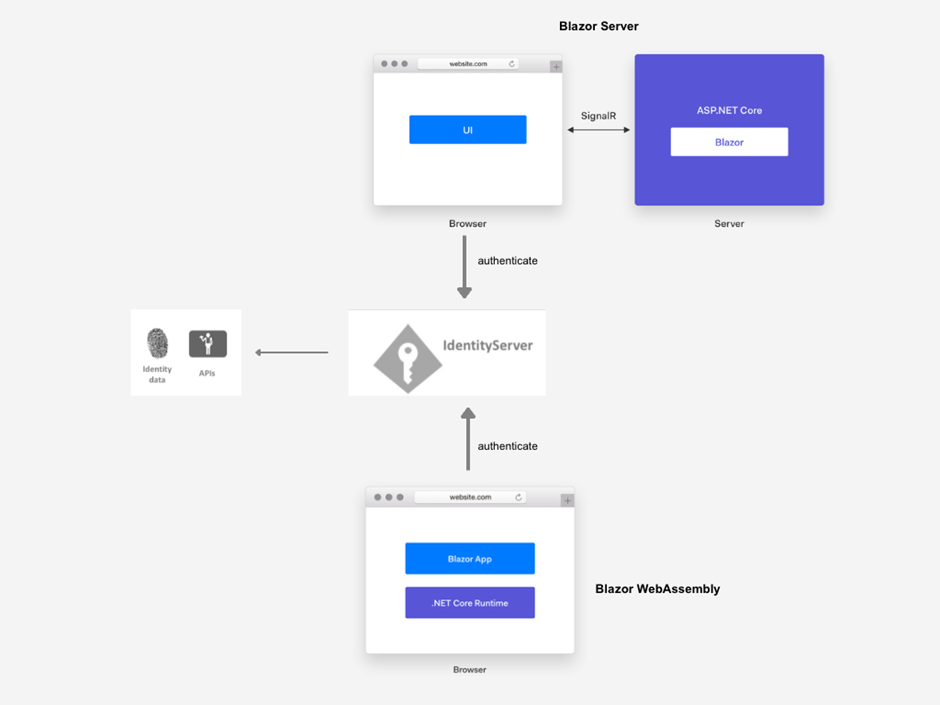
- Blazor Server or WebAssembly application serves as the client application.
- Client application interacts with IdentityServer4 for authentication and authorization.
- IdentityServer4 verifies the user’s credentials and generates access tokens.
- Blazor application uses access tokens to access protected APIs.
- Protected API is a separate web application with authenticated and authorized APIs.
- User’s browser is the primary interface for the Blazor application, making requests to the server and displaying the UI.
By using this architecture, developers can ensure that their Blazor Server and WebAssembly applications are secure and protected against unauthorized access.
Blazor WebAssembly vs. Blazor Server
Blazor, a web development framework developed by Microsoft, offers two deployment models: Blazor Server and Blazor WebAssembly. These models provide different approaches for building interactive web applications using C# and .NET.
Blazor Server focuses on server-side rendering, where UI interactions and events are handled by a server. This model utilizes a persistent SignalR connection to send updated UI to the client. On the other hand, Blazor WebAssembly enables running the entire application within the client’s browser using WebAssembly, allowing for offline execution and direct client-side interactions with APIs.
In this context, let’s explore the characteristics and distinctions of Blazor Server and Blazor WebAssembly architectures in more detail.
Blazor Server
- In Blazor Server, all UI interactions and events are handled by a server. When the client interacts with the UI, such as clicking a button or entering data into a form, it sends the events to the server.
- The server processes the events and updates the UI accordingly. The updated UI is returned to the client over a persistent SignalR connection.
- This approach allows for a responsive user experience, as the server can quickly process the events and send the updated UI to the client without requiring a full page reload.
- However, since the UI interactions are handled on the server, Blazor Server applications require an active connection to the server. If the connection is lost, the application may become unresponsive or display a stale UI until the connection is re-established.
- Blazor Server applications are typically deployed to a web server, where the server-side component runs and handles the UI updates and event processing.
Blazor WebAssembly
- In contrast, with Blazor WebAssembly, the entire application is downloaded to the client’s browser and runs within the browser’s WebAssembly sandbox.
- The client downloads the Blazor application as a WebAssembly package, a binary format that modern web browsers can execute.
- Once the application is downloaded and running in the browser, all UI interactions and event handling occur locally on the client-side. This means the client can interact with the UI without making round trips to the server for event processing.
- Blazor WebAssembly applications can even run offline, as the required code is already downloaded and executed within the browser.
- Additionally, Blazor WebAssembly applications can directly interact with APIs and services from the client-side. This allows for more flexibility regarding client-side data processing and integration with backend systems.
- However, it’s important to note that Blazor WebAssembly applications require the necessary resources to be downloaded to the client’s browser. This may result in a longer initial load time than Blazor Server applications.
- Blazor WebAssembly applications are typically deployed as static files on a web server or a content delivery network (CDN), which are then served to the client’s browser for execution.
Prerequisites
- Latest Net Core 5 SDK.
- Visual Studio 2019 Community or newer — free code editor for C#.
- Familiarity with IdentityServer4, OIDC, and oAuth2 terminologies.
Setting Up an IdentityServer4 Project for Blazor
To set up an IdentityServer4 project for Blazor, follow these steps:
Create a new ASP.NET Core Web Application project in Visual Studio.
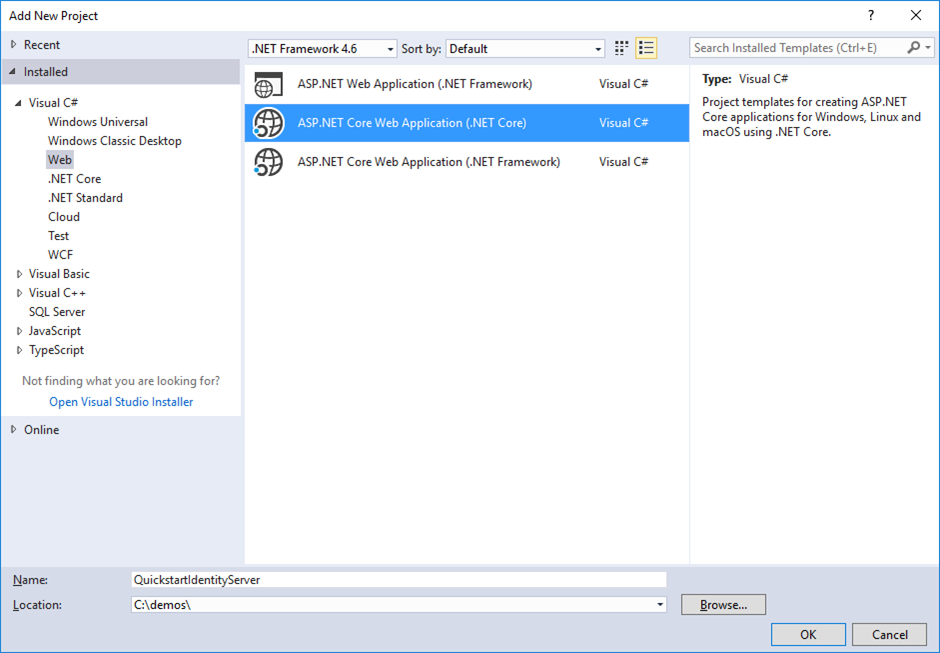
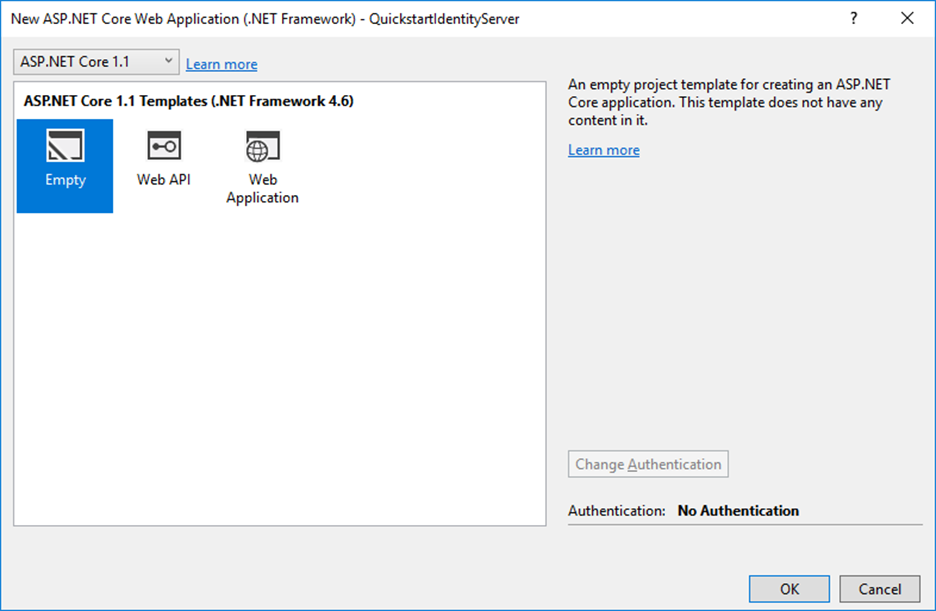
Select the “Empty” template and click “OK.”
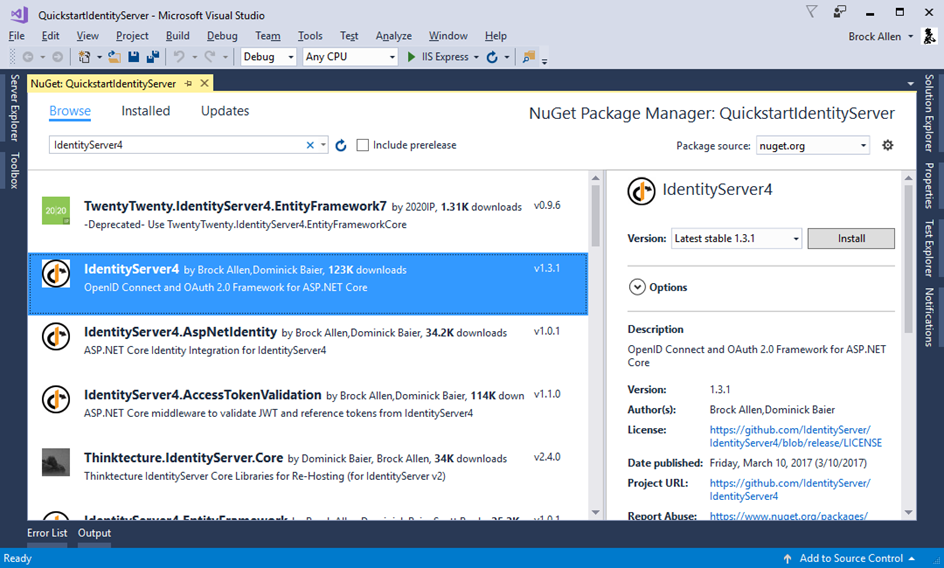
Install the “IdentityServer4” NuGet package.
Configure IdentityServer4 by adding the following code to the `ConfigureServices` method in the `Startup` class:
services.AddIdentityServer()
    .AddInMemoryApiResources(Config.GetApiResources())
    .AddInMemoryClients(Config.GetClients())
    .AddDeveloperSigningCredential();
Create a new class called Config and add the following code:
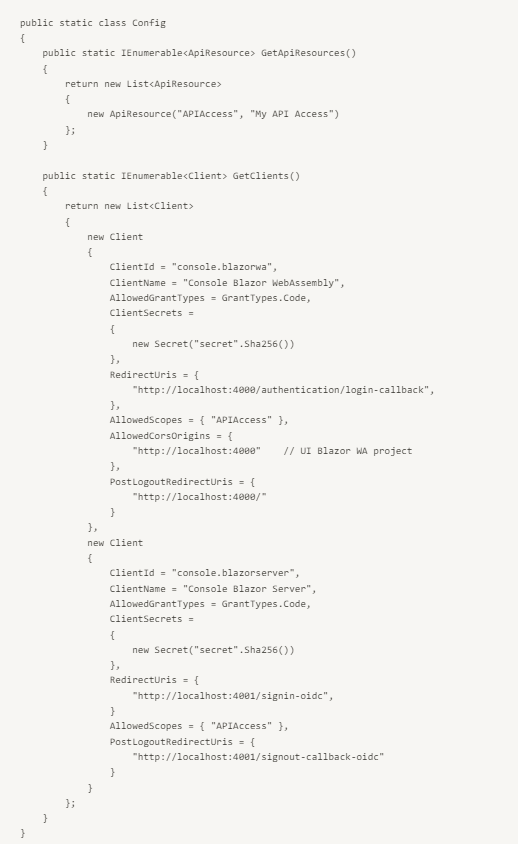
Configure the Configure method in the Startup class by adding the following code:
app.UseIdentityServer();
Run the application and navigate to the IdentityServer4 UI at https://localhost:5000
By following these steps, you can set up an IdentityServer4 project for use with a Blazor application. This IdentityServer4 project can authenticate and authorize users and generate access tokens with protected APIs.
Configure IdentityServer4 to Secure Blazor WebAssembly
Create a New Blazor WebAssembly Project
To create a new Blazor WebAssembly project, follow these steps:
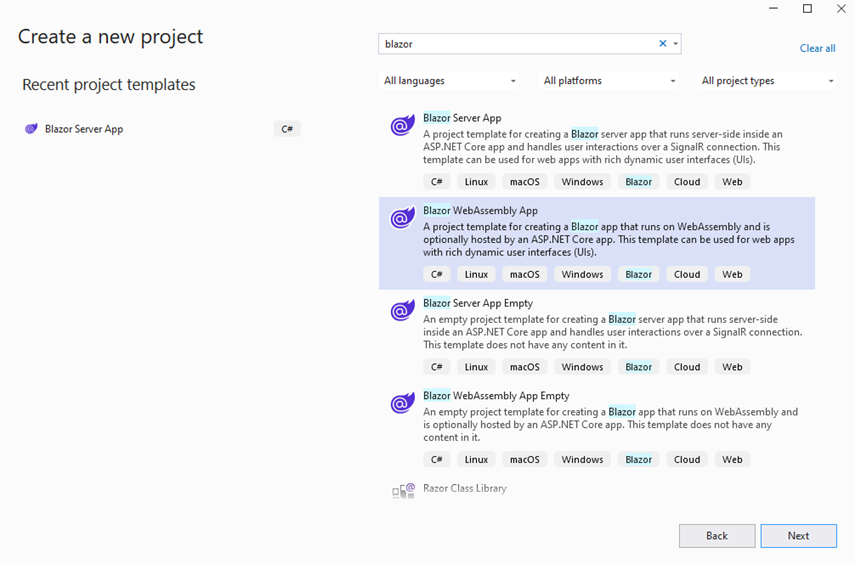
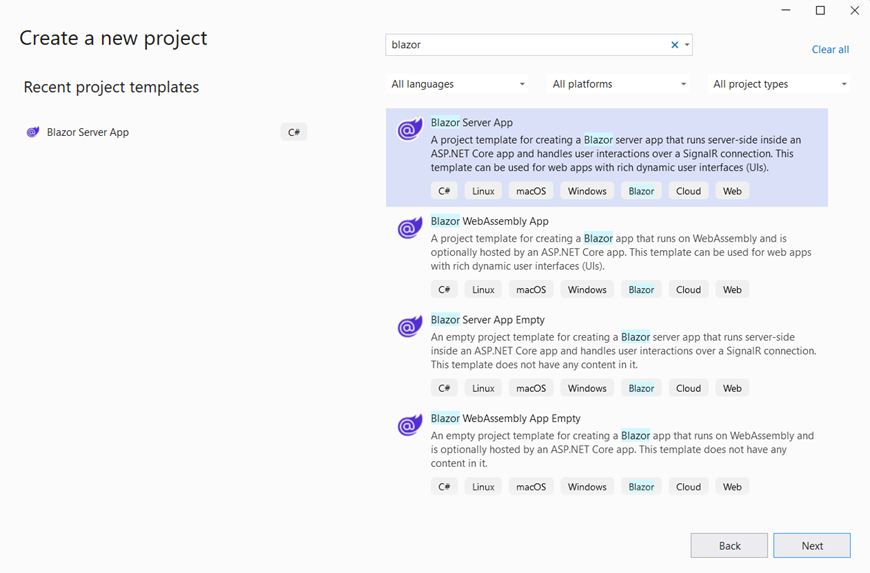
Open Visual Studio, create a new project, and select “Blazor WebAssembly App” from the list of project templates and click Next.
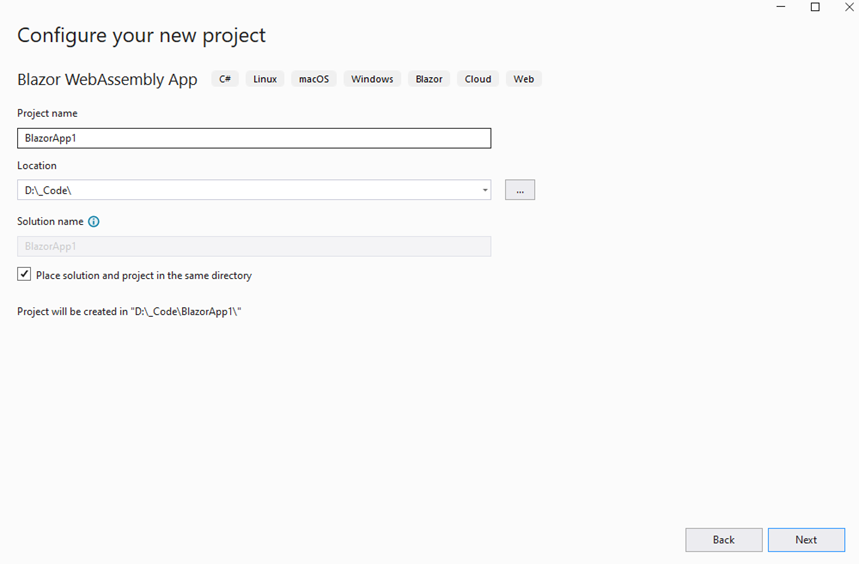
Choose a name and location for your project and click Next.
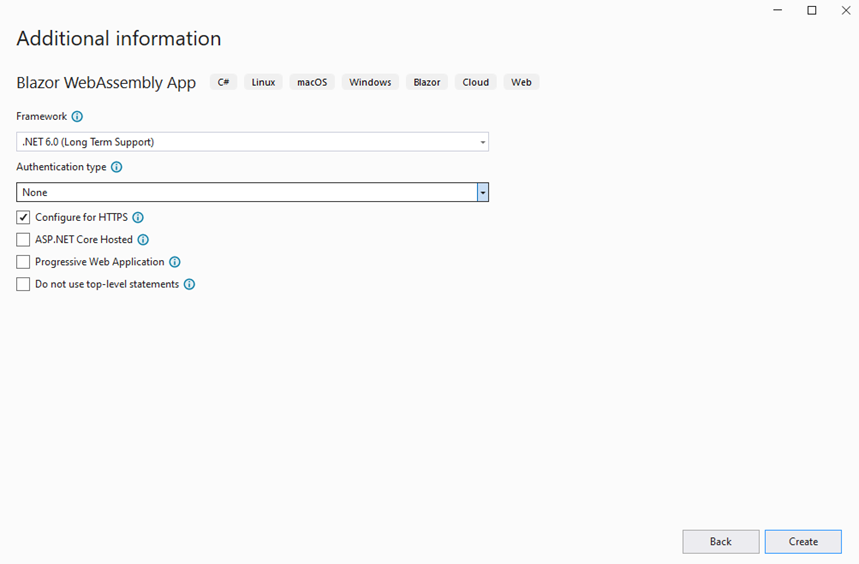
In the “Create a new Blazor WebAssembly App” dialog, leave the ASP.NET Core hosted as false and click Create.
Visual Studio will create a new Blazor WebAssembly project with a sample application that uses IdentityServer4 for authentication and authorization.
Following these steps, you can create a new Blazor WebAssembly project and develop your application with IdentityServer4 authentication and authorization. Or you could use your existing Blazor WebAssembly project.
Configure IdentityServer4
Set Up appsettings.json
To connect your Blazor app to IdentityServer4, configure the settings in the appsettings.json file inside the wwwroot folder. These settings include the Authority, ClientID, ResponseType, and other values that must match the ones we set up in IdentityServer4. Ensuring that these settings are correctly configured for your Blazor app to authenticate and access the protected APIs is essential.

In the Program.cs file, add the following code to the Main method:
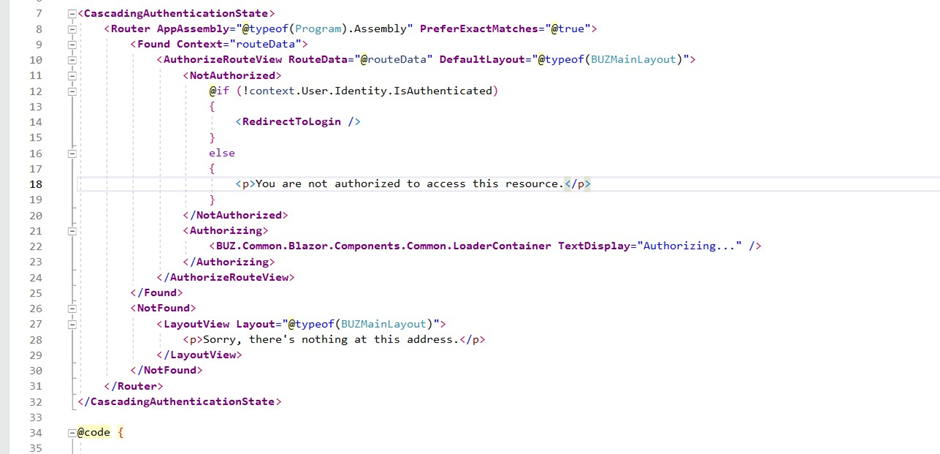
In the App.razor file, add the CascadingAuthenticationState element.

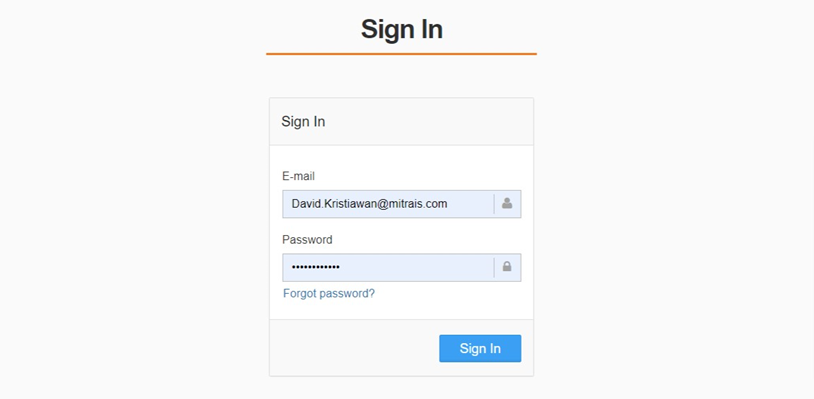
Run the application and navigate to the login page. You should be redirected to the IdentityServer4 login page. After logging in, you should be redirected back to the Blazor WebAssembly app.
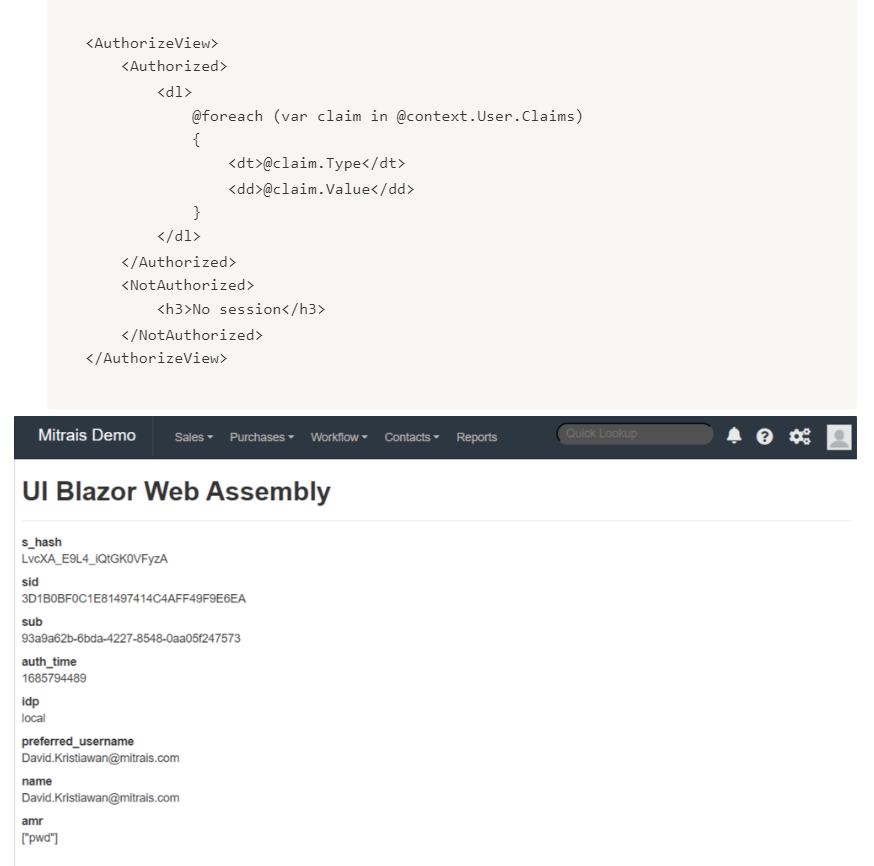
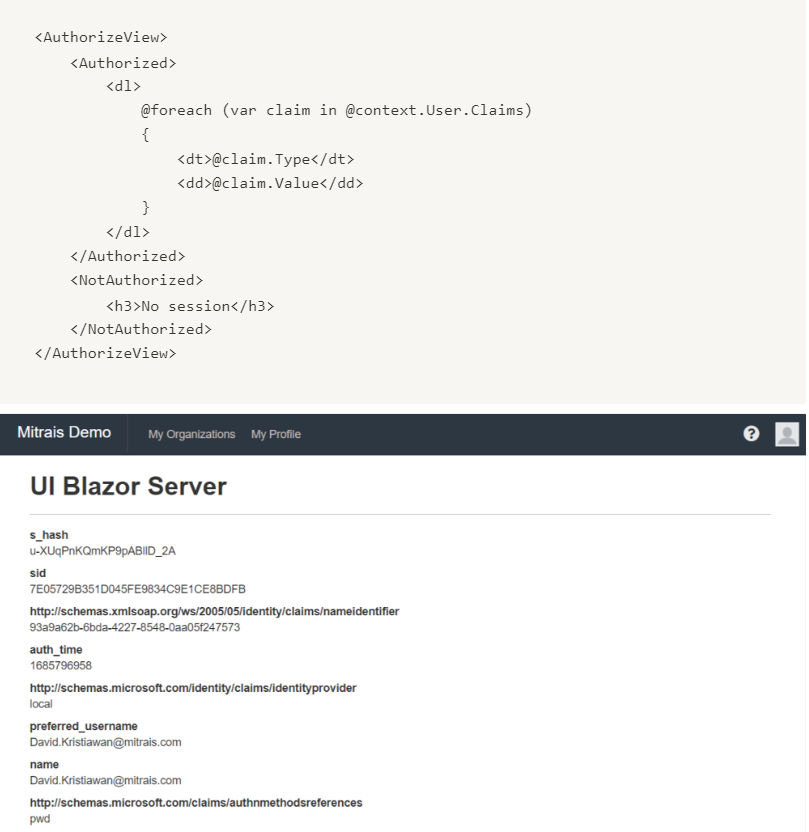
We could add some code in index.razor to see the User Claims values from IdentityServer4.
Configure IdentityServer4 to Secure Blazor Server
To configure IdentityServer4 to secure a Blazor Server application, follow these steps:
Create a new Blazor Server application in Visual Studio.
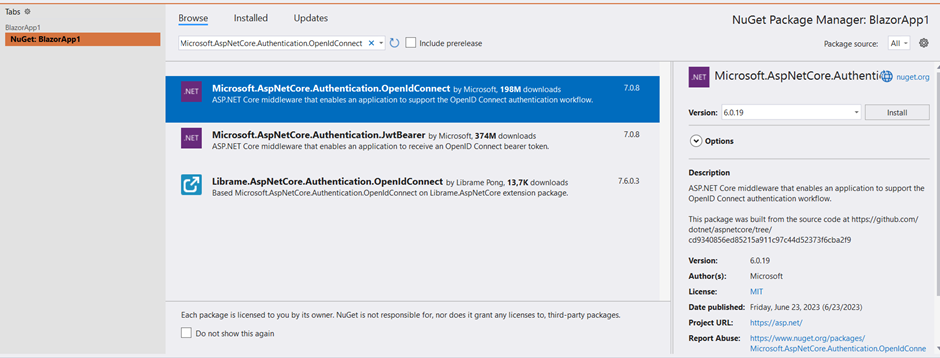
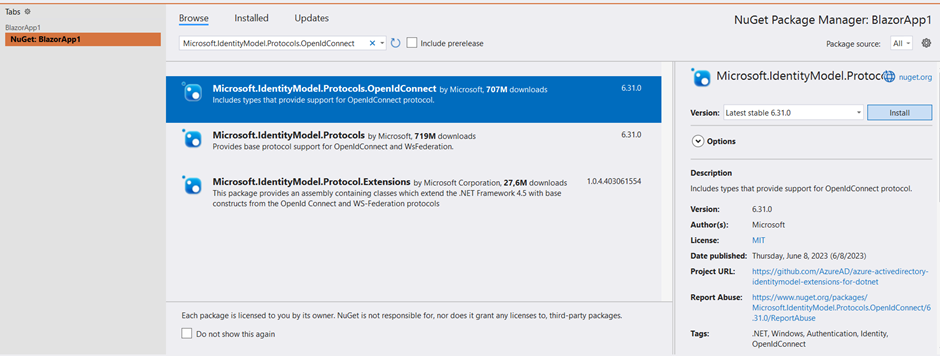
Install the “Microsoft.AspNetCore.Authentication.OpenIdConnect” and “Microsoft.IdentityModel.Protocols.OpenIdConnect” NuGet packages.
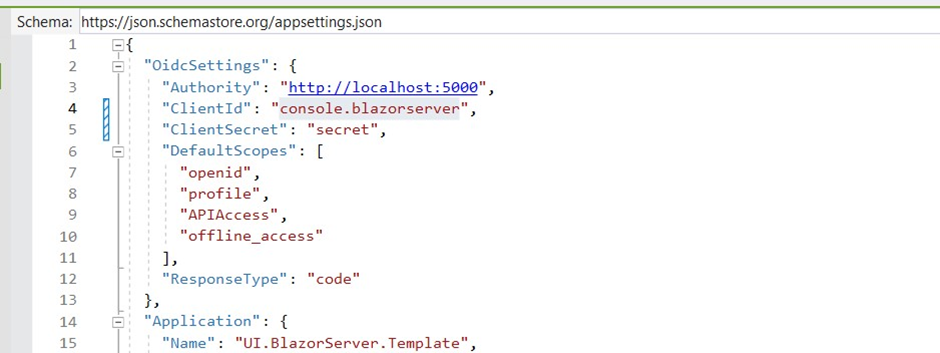
Configure the oidc settings in the appsettings.json file. These settings include the Authority, ClientID, ResponseType, and other values that must match the ones we set up in IdentityServer4.
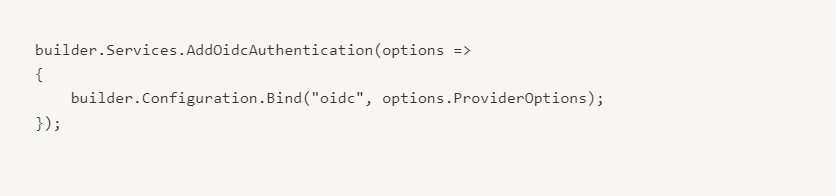
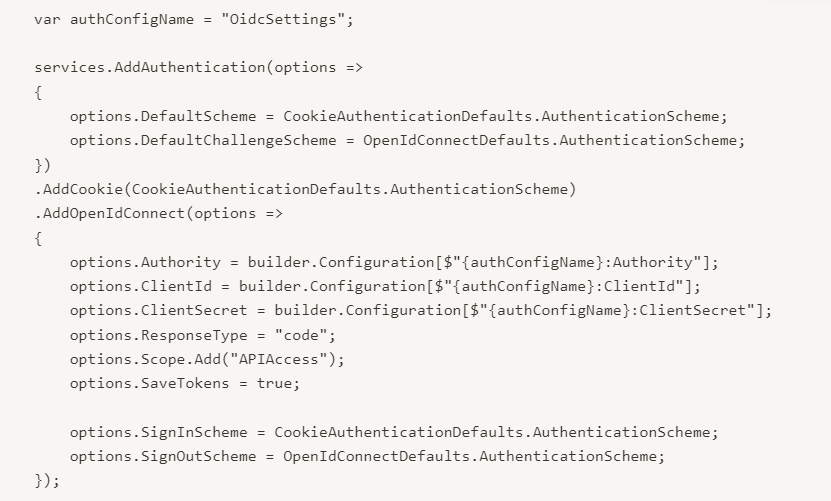
In the Startup class, add the following code to the ConfigureServices method to configure OpenID Connect authentication:
In the Configure method, add the following code to enable authentication:

In the App.razor file, add the CascadingAuthenticationState element.
Run the application and navigate to the login page. You should be redirected to the IdentityServer4 login page. After logging in, you can go back to the Blazor Server app.

We could add some code in Index.razor to see the User Claims values from IdentityServer4.
Conclusion
In this tutorial, we discussed the differences between Blazor WebAssembly and Blazor Server apps and how to configure IdentityServer4 to secure both types of applications. We covered how to set up an IdentityServer4 project, create a new Blazor WebAssembly or Server project, and configure the necessary settings to enable authentication and authorization using IdentityServer4. We also demonstrated retrieving user claims values from the authenticated user session.
It’s important to note that while Blazor WebAssembly has the advantage of being able to run entirely on the client-side, it may require more time for the initial download and setup of the application. Blazor Server, however, requires a constant connection to the server but may have better performance and quicker response times. Depending on the requirements of your application, either Blazor WebAssembly or Blazor Server may be a better fit.
Overall, Blazor is a powerful and flexible framework for building modern web applications using C# and .NET. By leveraging the power of IdentityServer4 for authentication and authorization, you can build secure and reliable applications that meet the needs of your users and your organization.
Author: David Kristiawan, Software Engineer


