
Background
Ensuring that our code is reliable and stable is crucial in software development. However, oftentimes we do not know how reliable our code is until we encounter bugs and frustrations after deployment. To avoid these issues, it is imperative to implement strong automated testing strategies.
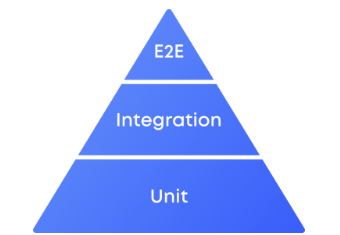
Automated testing in Golang offers a solution to these challenges by embracing 3 main types of testing:
- Unit tests which validate isolated code components, ensuring their individual functionality.
- Integration tests that assess the interaction between various modules within the system.
- End-to-end tests which mimic user actions, validating the entire application workflow.
Implementing this comprehensive suite of tests enhances code quality, reduces the chance of bugs in production, and ultimately improves software reliability and stability.
Unit Tests
Unit tests, which are at the bottom of the ‘Testing Pyramid,’ focus on testing individual functions and modules in isolation. It ensures that each building block of our code works as expected. Popular libraries like ‘Testing,’ ‘Testify,’ and ‘GoMock’ provide handy tools for testing this layer.
Unit testing is a valuable practice for early validation of our code. It can be applied to various scenarios from simple arithmetic logic to utilizing external libraries in our code. Let’s explore how we can create effective unit tests in Go with different approaches.
1. Unit Test for the Same Package
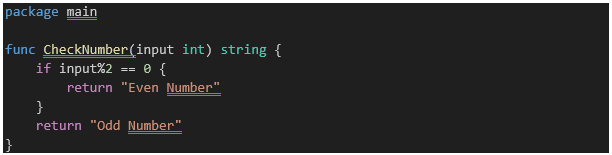
Consider a scenario where we want to determine whether a given number is odd or even. We create a function in a new Go file named ‘main.go’ and develop the necessary logic.
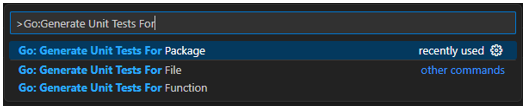
For testing, we will need to create a new file using the format `filename_test.go` or we can generate it from Visual Studio Code by navigating to View > Command Palette > Go: Generate Unit Tests For…
In this blog post, we will use a generated file from Visual Studio Code that will generate the test function and its test table as in the code snippet below:
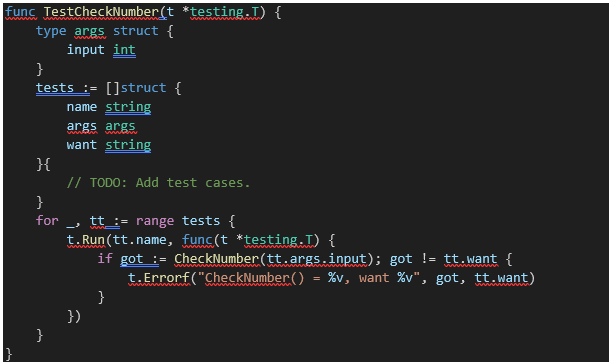
For comprehensive test coverages, we’ll create two test cases in the line provided and update our code as shown below:
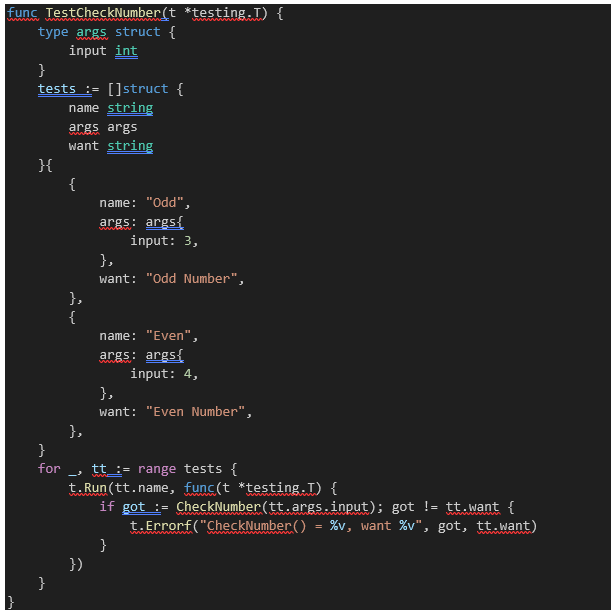
By incorporating these test cases into the generated test table, we ensure complete coverage of our code. To test it, we can run the code in terminal mode with the following command: `go test ./…` for all test files in our codebase, or `go test -run ‘function name’`
In this case, the command will be `go test -run TestCheckNumber`.
2. Unit Tests for Different Packages
As codebases expand, maintaining modularity and adhering to best practices becomes crucial. Layers like service and repository handle distinct responsibilities, making unit testing essential. Mocking also becomes valuable to avoid delving too deeply into external functions and to focus on individual function testing.
Libraries like ‘Testify/Mockery’ or ‘GoMock’ can assist in mocking functions from different layers. Dependency injection ensures these functions can be mocked.
Consider the following example:
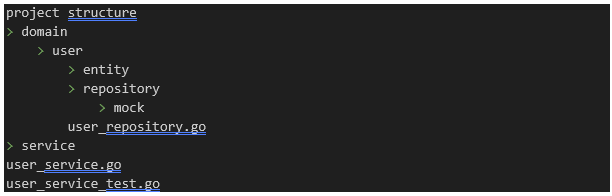
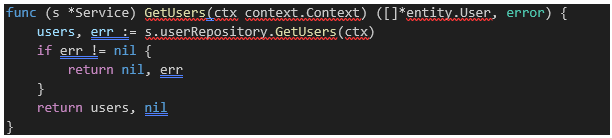
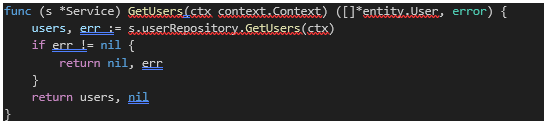
In this example, the ‘GetUsers’ function from the service package in the `user_service.go` file interacts with the database through the repository package in `user_repository.go`
To test this function, we will need to create an interface to abstract the ‘GetUsers’ function and perform dependency injection.
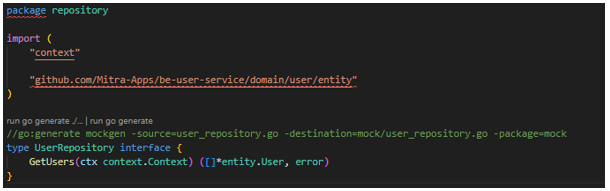
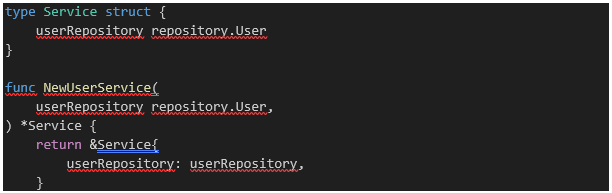
Hint: by clicking `run go generate ./…` above, we can create the generated mock file that will be needed for our unit test later. Next, we’ll inject it in our service structure in `user_service.go` by creating a `NewUserService` constructor function:
Now we can create a test file as demonstrated earlier to generate the test file with the name `user_service_test.go`
Import the generated mock file into the test file and use it based on the defined test cases.
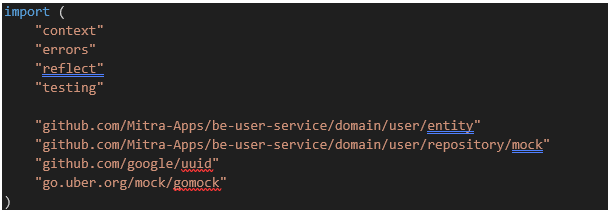
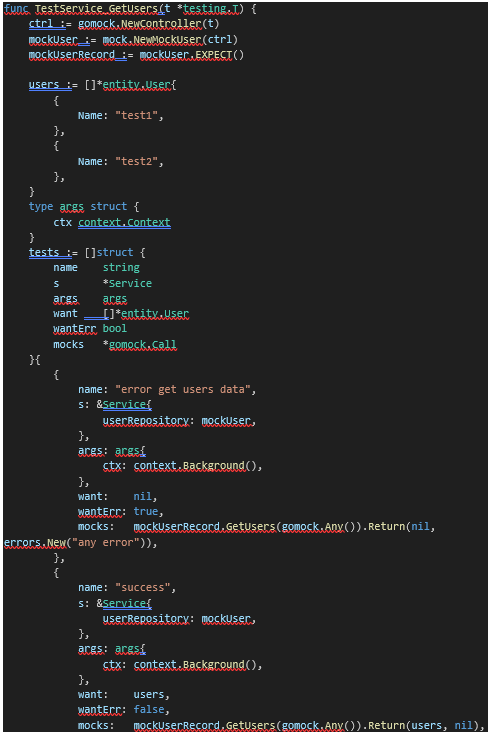
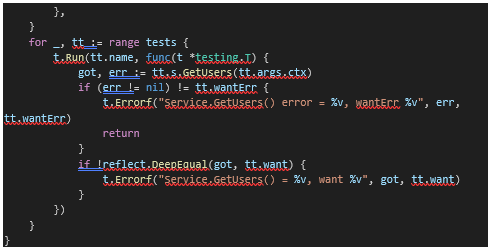
Utilize the mock functions in our `user_service_test.go` file by constructing a new controller in the GoMock library.
3. Unit test for External Library Usage
Creating unit tests for external library usage involves additional considerations since we cannot directly mock external functions. It is essential to avoid using external functions directly in test cases. Like mocking functions from different packages in Go, abstraction is crucial in this scenario. We create our own interface, enabling us to call and mock the external function.
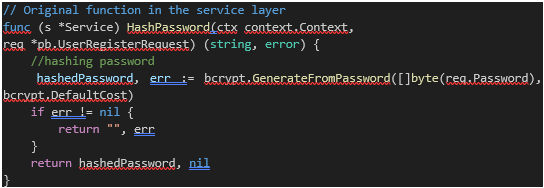
Let’s say we want to hash a password by using the ‘GenerateFromPassword’ function in the ‘bcrypt’ library. Instead of directly calling the ‘GenerateFromPassword’ function from the ‘bcrypt’ library, we need to wrap it in an interface in our code so that it can be mocked.
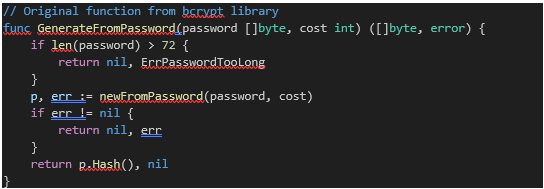
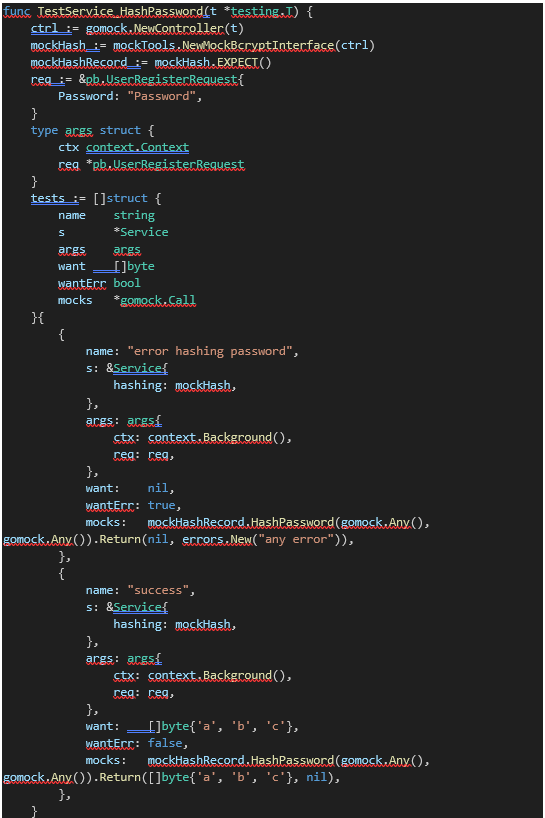
To enable mocking, we can call the external function ‘GenerateFromPassword’ from the ‘bcrypt’ library in a function in the case `HashPassword` and then wrap that function to the `BcryptInterface` interface to apply the abstraction:
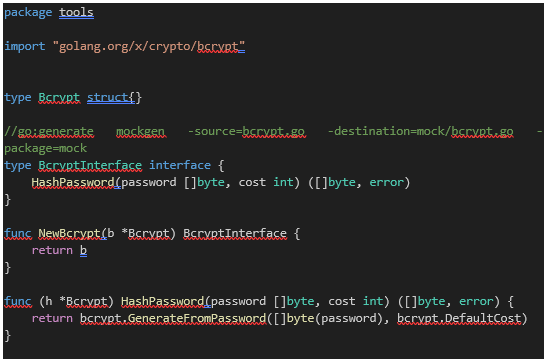
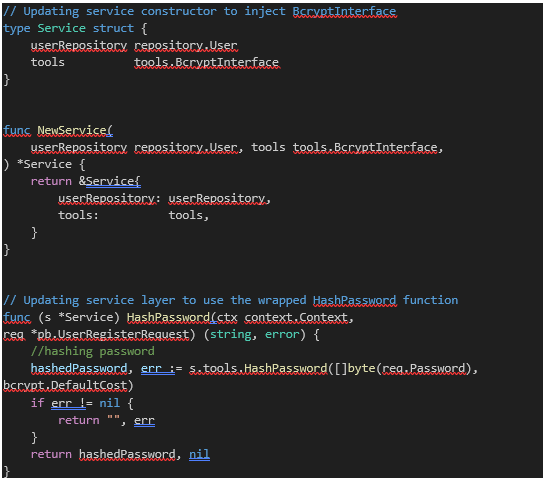
By creating the comment `BcryptInterface` we can now mock the function similarly to the previous example. We’ll inject this interface into our service constructor and update the service layer accordingly:
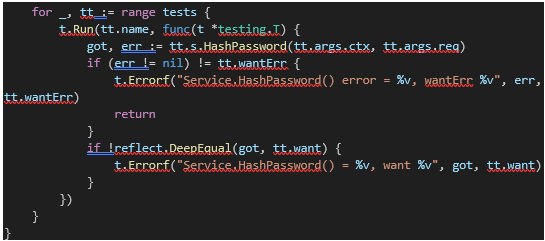
In the test file, we’ll utilize the same approach to mock the external function:
This approach can be extended to mock other external library functions such as AWS S3, Redis, and more. It enhances the unit testing process, allowing for comprehensive testing even before manual testing on the server.
Integration Testing
Integration testing plays a crucial role in validating the collaboration between different components or layers within a software system. Unlike unit tests, which focus on individual functions, integration tests ensure that these functions interact harmoniously within the broader context of the application.
Let’s examine a scenario within a Service layer, featuring a ‘GetUsers’ function interacting with the database through the UserRepository layer:
For successful integration testing, thorough validation of interactions between service and repository layers is essential. Unlike unit tests that involve mocking external dependencies, integration tests require real implementations of these dependencies.
In our scenario, the ‘UserRepository’ interface abstracts the data access layer. To facilitate testing, we’ll create an implementation of this interface that interacts with a dedicated test database. Here, we’ll create a new table or schema specifically for integration testing:
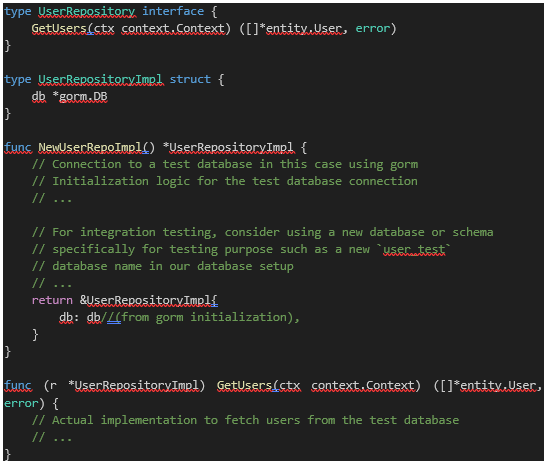
In our integration test file, we will use the actual `UserRepositoryImpl` and the Service to perform integration testing. Additionally, we configure the connection to a new database or schema specifically for integration testing.
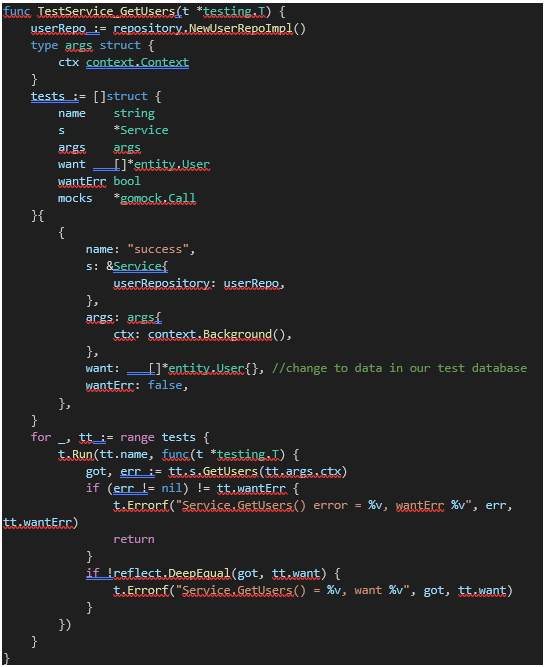
One noticeable difference between unit tests and integration tests lies in the usage of real data. In integration tests, we directly check and construct data within our test case. This approach allows us to verify whether our database is running and integrated into our system, ensuring the correctness of data and logic even before making any changes to our development or production database.
End-to-End (E2E) Testing
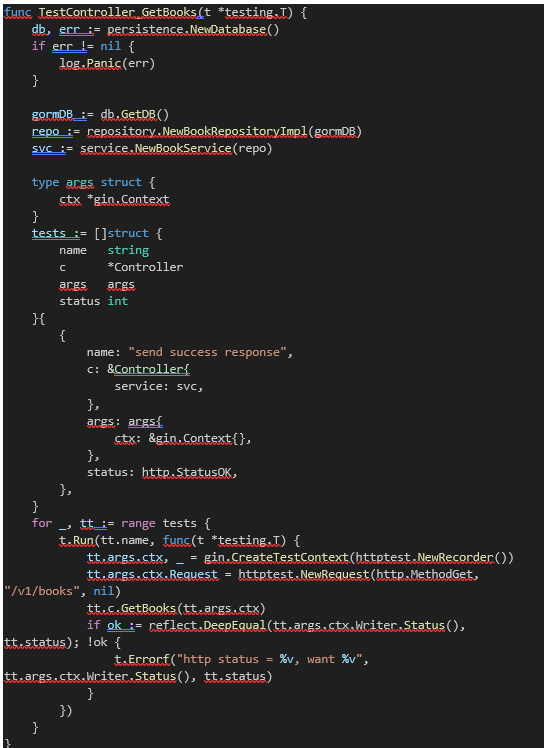
While unit tests and integration tests focus on specific components and their interactions, End-to-End (E2E) testing takes a holistic approach by validating the entire system’s functionality. E2E tests simulate real user scenarios, covering the complete flow of an application from start to finish. In our example, let’s delve into a book service scenario. Assume we have a controller layer responsible for handling an HTTP Get API, called ‘GetBooks’ in BookService which fetches data from the database handled in the Repository layer.
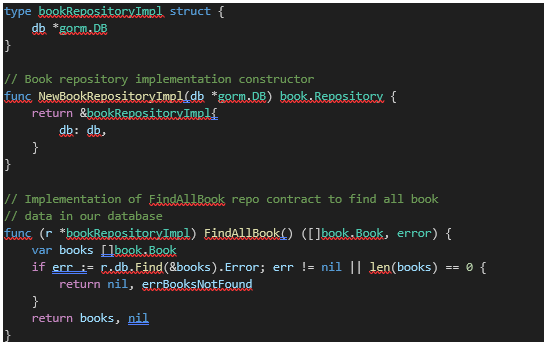
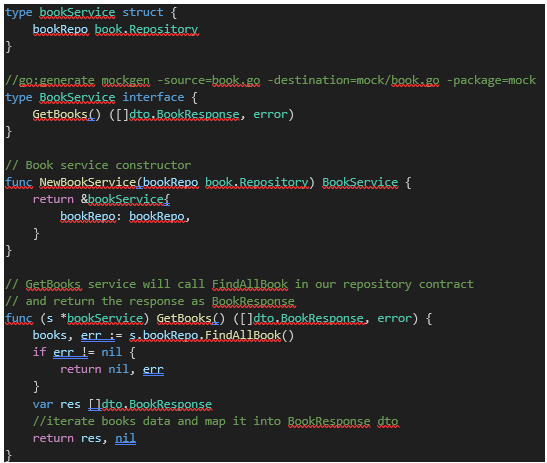
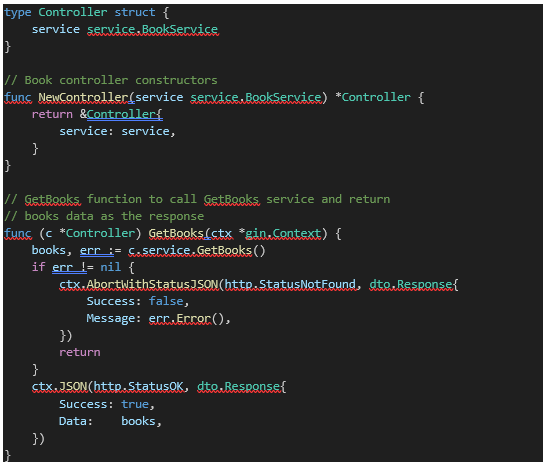
In E2E testing, the objective is to ensure that our ‘GetBooks’ API works seamlessly, covering the entire system. We interact with the application just as a real user would, starting from hitting the ‘GetBooks’ endpoint to checking whether we receive an HTTP StatusOK if it’s successfully consumed. Therefore, instead of using mock data, we would need to connect to the database, construct the repository, and service in our test file.
E2E testing ensures that all parts of the system, including the database, interact correctly and deliver the expected results. By simulating real user scenarios, we can identify issues that may not be apparent in unit or integration tests. While E2E testing may involve more setup and execution time, it provides confidence in the system’s overall functionality.
Conclusion
Automated testing offers numerous benefits, however there are trade-offs to consider.
Benefits include:
1. Reduced regressions: It helps in catching bugs early on, saving time and money.
2. Faster development cycles: Automated tests run quickly and reliably, enabling quick feedback and iteration.
3. Improved code quality: Writing tests improve the overall quality and reliability of our code.
4. Stable releases: When we release our code, we can have the confidence that it has been thoroughly tested.
Trade-offs:
1. Time consumption: Setting up and maintaining automated testing can be time consuming.
2. Needs validation: Automated testing may not cover every possible scenario, hence it still requires manual testing as well.
In conclusion, automated testing in Golang has many advantages. However, it is essential to choose the right kind of testing for our specific codebase. Further research and experimentation with different frameworks or tools are necessary to find what works best for our development process. By implementing a robust automated testing strategy, we can enhance the efficiency and reliability of our code.
References:
https://pkg.go.dev/go.uber.org/mock/gomock – https://go.dev/blog/integration-test-coverage – https://medium.com/star-gazers/5-testing-tips-in-go-3b7f79a546da – https://martinyonathann.medium.com/integration-unit-and-e2e-testing-in-golang3e957f9920dd – https://www.ompluscator.com/article/golang/practical-solid-dependencyinversion/?source=post_page—–8cbd4eed484b——————————– – https://www.ardanlabs.com/blog/2019/10/integration-testing-in-go-set-up-and-writingtests.html


