by Mateus Yonathan, Analyst Programmer at Mitrais
What is Firebase?
Firebase is a Software as a Service (SaaS) provided by Google.
Before, Firebase developers had to spend extra effort building their own backend after writing their chosen mobile app. There was no instant backend for API, which could be integrated with a mobile app to provide services such as authentication, real-time database access, cloud storage etc.
Firebase was released by Google on March 9th, 2017 as a public beta version. With Firebase, developers can now make applications without server-side programming, making development much quicker and easier.
With Firebase, we do not need to spend extra effort on building servers or building REST APIs, with just a little bit of configuration we can give Firebase a chance to manage all of our backend requirements, such as storing data, verifying users, and implementing access rules.
Firebase supports web, iOS, OS X, and Android clients. Applications using Firebase do not need to worry about how to store the data, they can just use and control data and synchronize across various instances of the application in real time. We do not need to write server side code or to deploy a complex server framework to get an app started with Firebase.
Below are some of the Pros and Cons of Firebase:
Pros
- Supports several authentication types: email & password, Google, and Facebook
- Real-time data
- API ready to use
- Built-in security at the data node level
- File storage backed by Google Cloud Storage
- Static file hosting
- Treats data as streams to build highly scalable applications
- No need to manage backend infrastructure
Cons
- Firebase’s data stream model may limit the ability to write complex queries
- Since it uses NoSQL, the traditional relational data models are not applicable and developers SQL query technical skill will not be useful
- There is no on-premise installation
Integrating React Native application with Firebase for user authentication
So let’s get started.
First, you need to register your Firebase account.
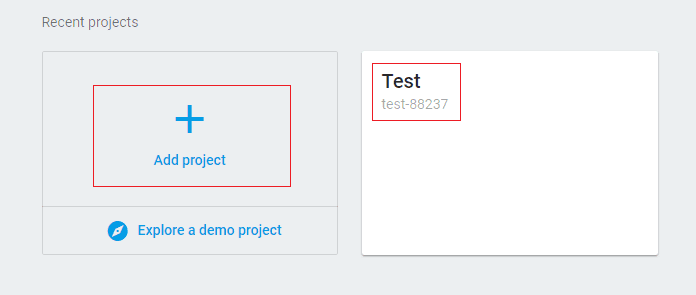
Create your project example ‘Test’ project

Go to Authentication page, and then choose tab users

Enable Email/Password

Press Add User button to add new user, set its email and password, example email: Oke@ oke.com, password: 123456

At this state, you have successfully created user in Firebase.
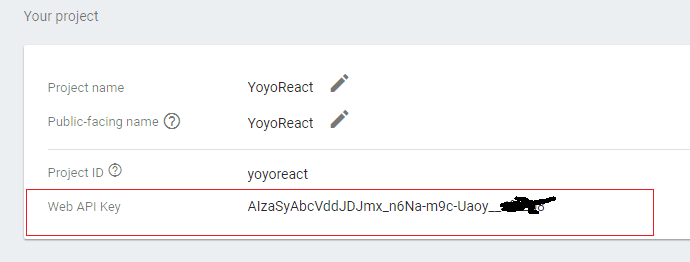
Obtaining Firebase API key
Go to Project Setting

Obtaining Firebase API
Just simply copy the Web API key

Obtaining Authorized Domain
Go to Authentication then choose Sign-In Method

Scroll down until you find Authorized Domains, the red box is your authorized domain.

Obtaining Database URL
Go to the Database menu, Data tab

Your Database URL is in the red box.
Obtaining Storage URL
Go to Storage menu choose Storage, you will see a link, for example in the red box is the URL of the obtaining storage

Setup your React Native project
Install NPM via Node.js Command Prompt

Type npm install npm@latest –g
At this step, we need to have a React Native application, which has a login form, if you do not have it, you can download all of the source code from the link below:
Download React Native Login Screen App from this GitHub repository.
After downloading all of the source codes, then type on the console based on your directory files downloaded files:
npm installA bit explanation on the code
At folder login/index.js from the downloaded files, we can see initialization of firebase statement:

You can replace the code with your Firebase API key, example below:
import * as firebase from "firebase";

firebase.initializeApp({apiKey: "", authDomain: "", databaseURL: "", storageBucket: ""});
Run your React Native project
Start your emulator

On the console type:
react-native run-androidCongratulations!
You are now up and running with Firebase.


