Microsoft ASP .NET Core applications can be executed and hosted on a machine which runs Linux OS, including on an Azure Linux Virtual Machine (VM). Hosting ASP .NET Core applications on a Linux VM could be an attractive alternative to running on Windows Server VM.
The cost of running Linux VM on Azure is much cheaper compared with running Windows VM on the same cloud platform. I found it through running the Linux VM on Azure for 24 hours and the Windows Servers VM on Azure for 4 hours, stopped it as dormant for next 20 hours, then compare their spent $ costs, as shown on this following picture.
Azure VM Costs
| VM Type | Disk Cost | VM Cost (per hour) | Total Cost (per hour) | Estimated Total Cost (24 hours) |
|---|---|---|---|---|
| Azure Linux VM | $0.05 | $0.06 | $0.11 | $2.64 |
| Azure Windows VM | $0.16 | $0.03 | $0.19 | $4.56 (or $8.16 if running 24 hours) |
Both VMs were built based on same machine VM Size: B2ats_v2 (2 vCPUs, 1 GB Ram, 32 GB Storage Drive), with Run with Azure Spot discount option is enabled, using cheapest Storage Drive type: Standard HDD, and placed in US-EAST region (because this region offers cheapest VM’s cost).
Besides Linux VM is cheaper than Windows Server VM, a Linux VM is also sparing relatively adequate amount of CPU and Memory resources which are useful to be used for running applications such as ASP .NET Core app or Database server. With the same VM spec, the number of free resources on Windows Server VM is considered smaller, compared to Linux VM’s, especially when the VM using budget spec like B2ats_v2 machine.
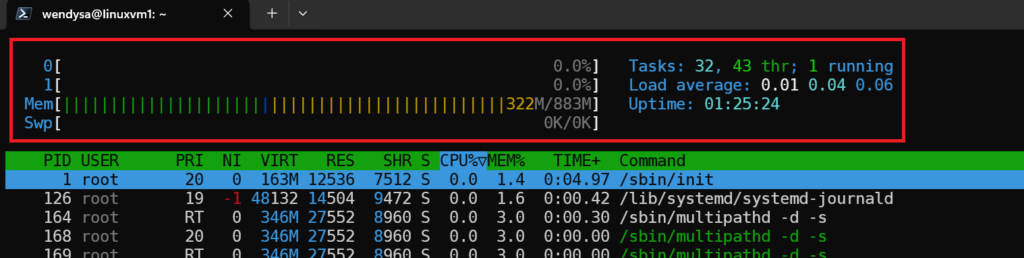
Figure 01. Available Resources of the Azure Linux VM
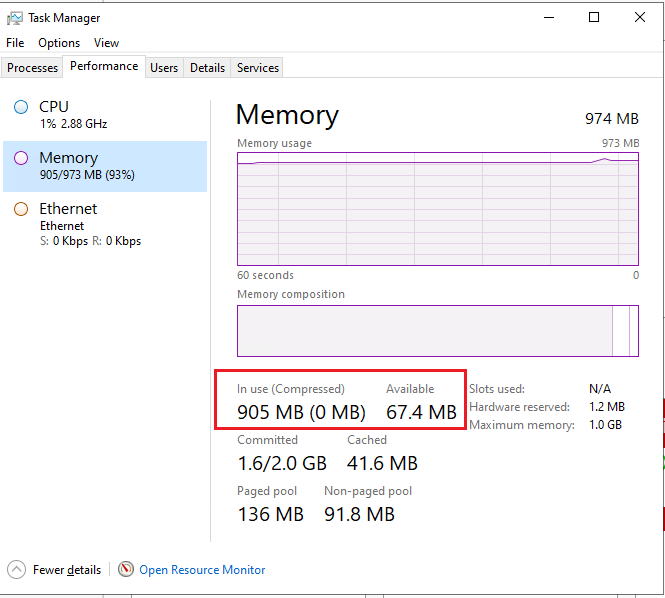
Figure 02. Available Resources of the Azure Windows VM
Fortunately, the modern version of ASP .NET Core can be run on other OS than Windows such as Linux, Mac and others. Therefore, it would be nice to have a server sitting on Cloud platform like Azure, running ASP .NET Core apps with cheapest cost, for development, demo or testing purposes, which is running on Linux OS based VM.
In this article, we are going to cover how to achieve it, step-by-step.
Pre-requisites
- It is assumed that you have prepared an Azure Linux VM resource.
- Latest .NET Core version, installed on the Azure Linux VM (e.g., .NET Core version 8.0.5).
- rsync or git, installed on the Azure Linux VM. We are going to use them to copy/clone our ASP .NET Application’s source code into the Azure Linux VM.
Setup Nginx on Linux Azure VM.
- In your local machine, run ssh command to connect to the Azure Linux VM (assuming, your private key *.pem file is placed in ~/.ssh directory).
ssh -i ~/.ssh/<your VM’s SSH Private key file>.pem <username of your VM>@<public IP Address of your vm>
Example:
ssh -i ~/.ssh/azurevm1_key.pem wendy_s@72.123.456.789
- Install the Nginx server on the Azure Linux VM.
sudo apt-get install nginx -y
- Browse to your Azure VM’s Network Settings page, on Azure Portal. In the Inbound port rules section, ensure that you have added a rule to allow inbound connection against HTTP Service’s port 80.
Figure 01. Allowing inbound connection to the VM’s HTTP port.
- Using your browser, navigate to http://<your vm’s public IP> and confirm the following Nginx page is displayed on your browser.
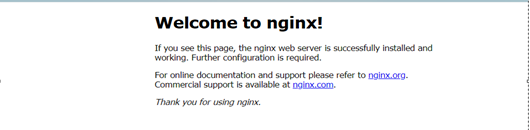
Figure 02. NGINX’s default home page.
- Create a new folder to keep the ASP .NET Core published files in the /var/www directory (e.g.,/var/www/catalog)
sudo mkdir /var/www/<your app's name>
- Back to your CLI window, we are going to create an nginx configuration file for the ASP .NET Core application later. Copy the default file & name the copied file as your application’s name (e.g., catalog), in
/etc/nginx/sites-availabledirectory
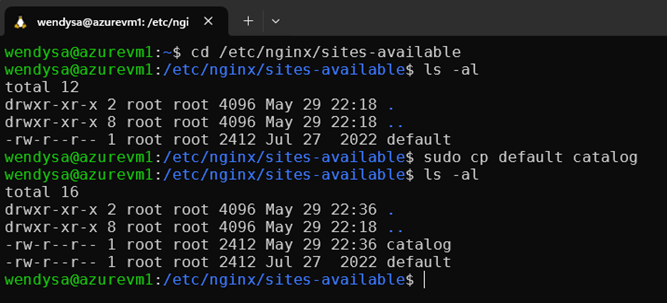
Figure 03. Copying NGINX’s default configuration file to be modified and use.
- Edit the copied configuration file on a text editor (e.g., vim, nano) as root (using sudo command), change the content with lines marked with red-coloured boxes as in the following screenshot, and save the changes.
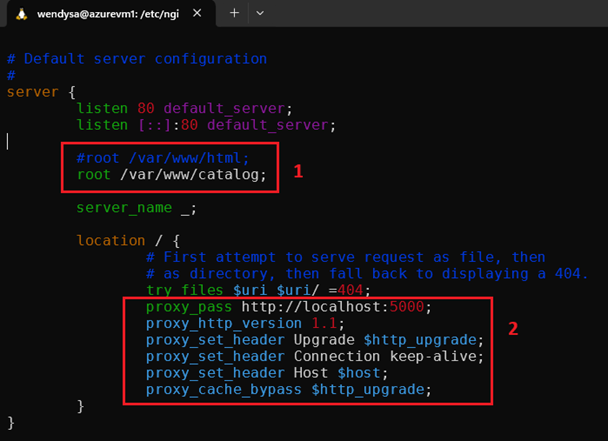
Figure 04. Applying reverse proxy settings on the copied NGINX configuration file.
The changes can be explained as follows:
1. Change the default root directory /var/www/html to our application’s directory: /var/www/<your app’s name>, in this case: /var/www/catalog.
2. Additional lines under red box #2, ensures that any HTTP inbound request will be redirected to localhost domain, port number 5000, where this will be the ASP .NET Core Application running.
- We need to enable the site configuration we created in the prior step. To do this, we are going to delete the link to
Nginx’sdefault configuration file under/etc/nginx/sites-enableddirectory and create a symbolic link to the configuration file we created in the prior step.
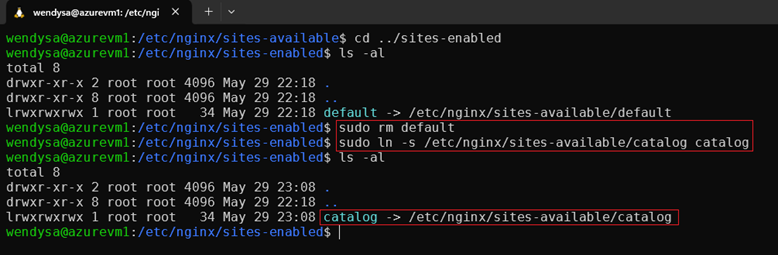
Figure 05. Enable the new NGINX configuration.
- Restart the
Nginxservice to ensure the configuration is applied.
sudo service nginx restart
- Back to your browser, refresh the page and ensure the default Nginx page is refreshed to 404 page, as shown in the following screenshot.

Figure 06. Typical 404 page (Not found) served by NGINX
This is expected because we have not published our ASP .NET Core Application into /var/www/<your app’s name> directory yet.
Getting ASP .NET Core Application’s source code into the Linux Azure VM.
If you put the application’s source code on a git repository host service such as GitHub, Bitbucket, AzureDevOps, etc, then you should just simply clone the code repo into some directory in your VM.
Alternatively, if the source code is in your local machine, you could use Linux’s rsync command, to upload the code from your local machine into your VM’s directory.
rsync -avz -e “ssh -I ~/.ssh/<your VM’s SSH Private key file>.pem” <path_to_local_files> <username of your VM>@<public IP Address of your vm>:~/path_to_remote_directory
Example:
rsync -avz -e “ssh -I ~/.ssh/azurevm1_key.pem” ./catalog wendy_s@72.123.456.789
The sample command means: “Copy the catalog directory in current directory into ~/Apps directory on remote machine whose IP address is 72.123.456.789 and the machine’s username login is wendy_s”
Building and Publishing ASP .NET Core application.
- Edit the Application’s Program.cs file, add these following lines right before the line app.UseAuthentication():
        app.UseForwardedHeaders(new ForwardedHeadersOptions

        {

            ForwardedHeaders = ForwardedHeaders.XforwardedFor | ForwardedHeaders.XforwardedProto

        });
The changes will ensure the information of proxied clients who initiate inbound requests, will not be lost (e.g., client’s IP Address, Port, HTTP/HTTPS protocol). More information can be found in this link.
- Build and publish the application into the newly created directory, in /var/www directory:
        dotnet build

        sudo dotnet publish -c release -o /var/www/<your apps name>
Confirm that the published artifacts exist in /var/www/<your apps name> directory. Example:
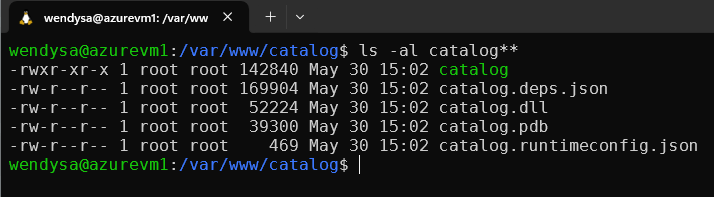
Figure 07. Published ASP .NET Core App’s Filed in /var/www/ directory.
- If the ASP .NET Core application is a web application which has assets files placed inside a subdirectory (e.g. wwwroot directory), you’ll need to copy/move these files into the root directory
(/var/www/<your apps name>)so that the assets can be loaded properly when the application is browsed.
Setup Systemd service for the ASP .NET Core application
1. Test if the `systemd` is working on the VM:
systemctl list-units-files --type=service
If the command returns no error, it should display a list of available systemd services along with their STATE (e.g., enabled, disabled, etc).
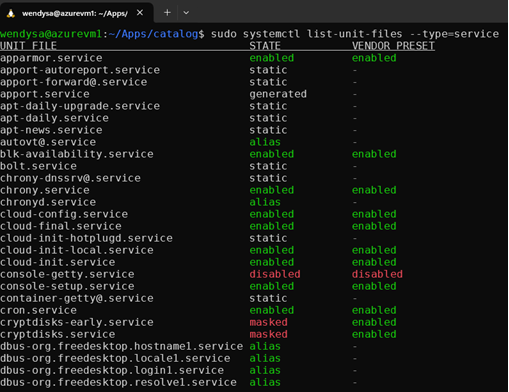
Figure 08. A list of SystemD services, displayed after running the CLI command.
2. On the /etc/systemd/system directory, create a new file and open it on `nano` or `vim`:
sudo vim /etc/systemd/system/<your apps name>.service
3. On the opened vim or nano text editor, type these following lines, then save and exit from the text editor:
        [Unit]
        Description=<Your apps name or description>


        [Service]
        WorkingDirectory=/var/www/<your apps name>

        ExecStart=/usr/bin/dotnet /var/www/<your apps name>/<your apps name>.dll

        Restart=always


        RestartSec=10

        KillSignal=SIGINT

        SyslogIdentifier=catalog

        Environment=ASPNETCORE_ENVIRONMENT=Production


        [Install]
        WantedBy=multi-user.target
Example:
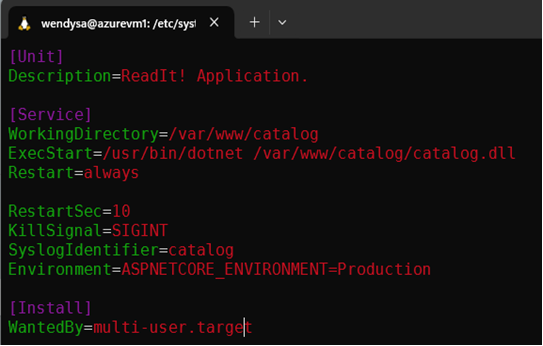
Figure 09. Example of systemD <your app’s name>.service file
4. Run this command to see if the service is loaded, but not started yet.
sudo systemctl status <your app name>.service
The command’s output should be displayed like this:

Figure 10. Status of the newly created SystemD service.
5. Start the systemd service we have just created, by running this command:
sudo systemctl start <your apps name>.service
When you re-run the sudo systemctl status <your app name>.service command, the status of your ASP .NET Application service should be displayed as active(running), now.
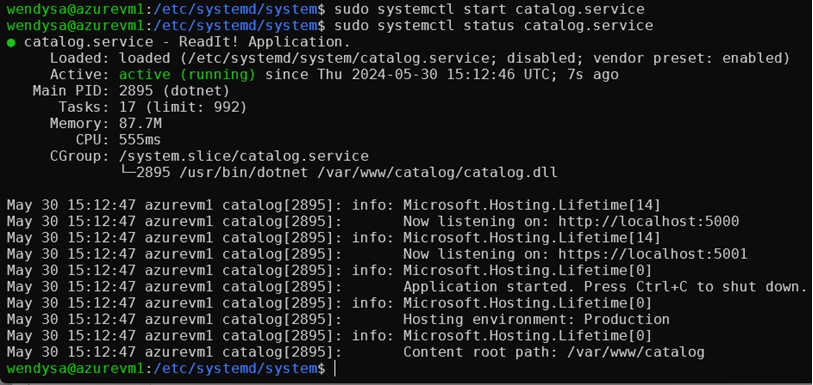
Figure 11. Status of the started ASP .NET Core application’s SystemD service.
6. Restart the nginx service
sudo systemctl restart nginx
7. Try browsing your ASP .NET Application on your local machine now. Confirm that your ASP .NET Application is up and running as expected. Example:
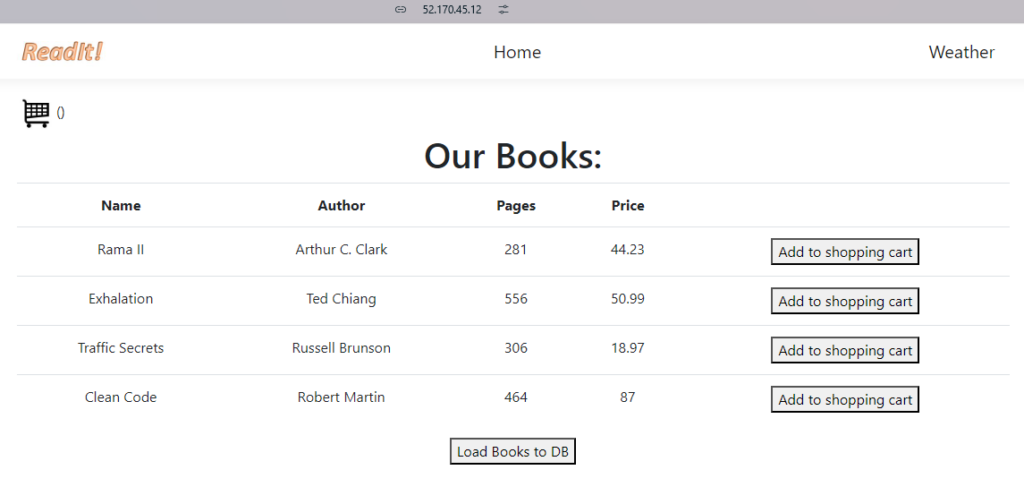
Figure 12. The sample web application is hosted on the VM and Online.
8. To start running the Service each time the VM boots, run this command:
sudo systemctl enable <your apps name>.service
Example:
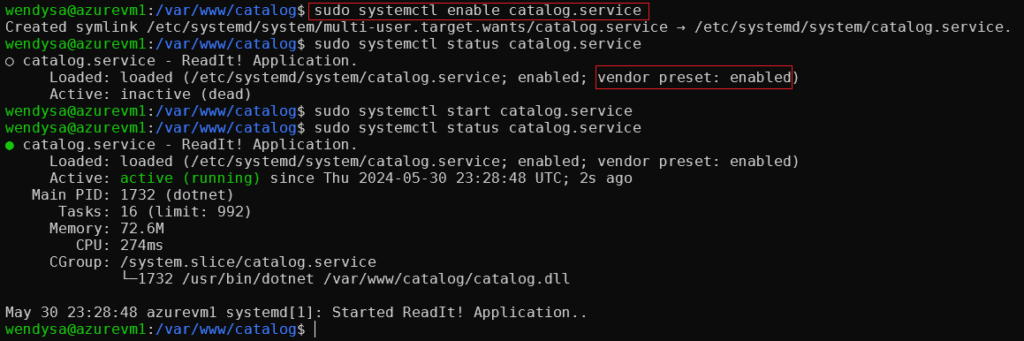
Figure 13. Status of the enabled ASP .NET Core application’s SystemD service.
Conclusions
By following the steps in this article, we should have our ASP .NET Core Application hosted and running on an Azure Linux VM, as a SystemD service. Whenever the VM is rebooted, the application will be automatically started.
I hope this guide can be useful for you, in case you need to host your ASP .NET Core Application on cloud for tasks such as demonstrating your app to your clients, development or testing purpose, on an Azure VM with cheapest disks and vm’s costs (i.e., B2ats_vs VM Size).


